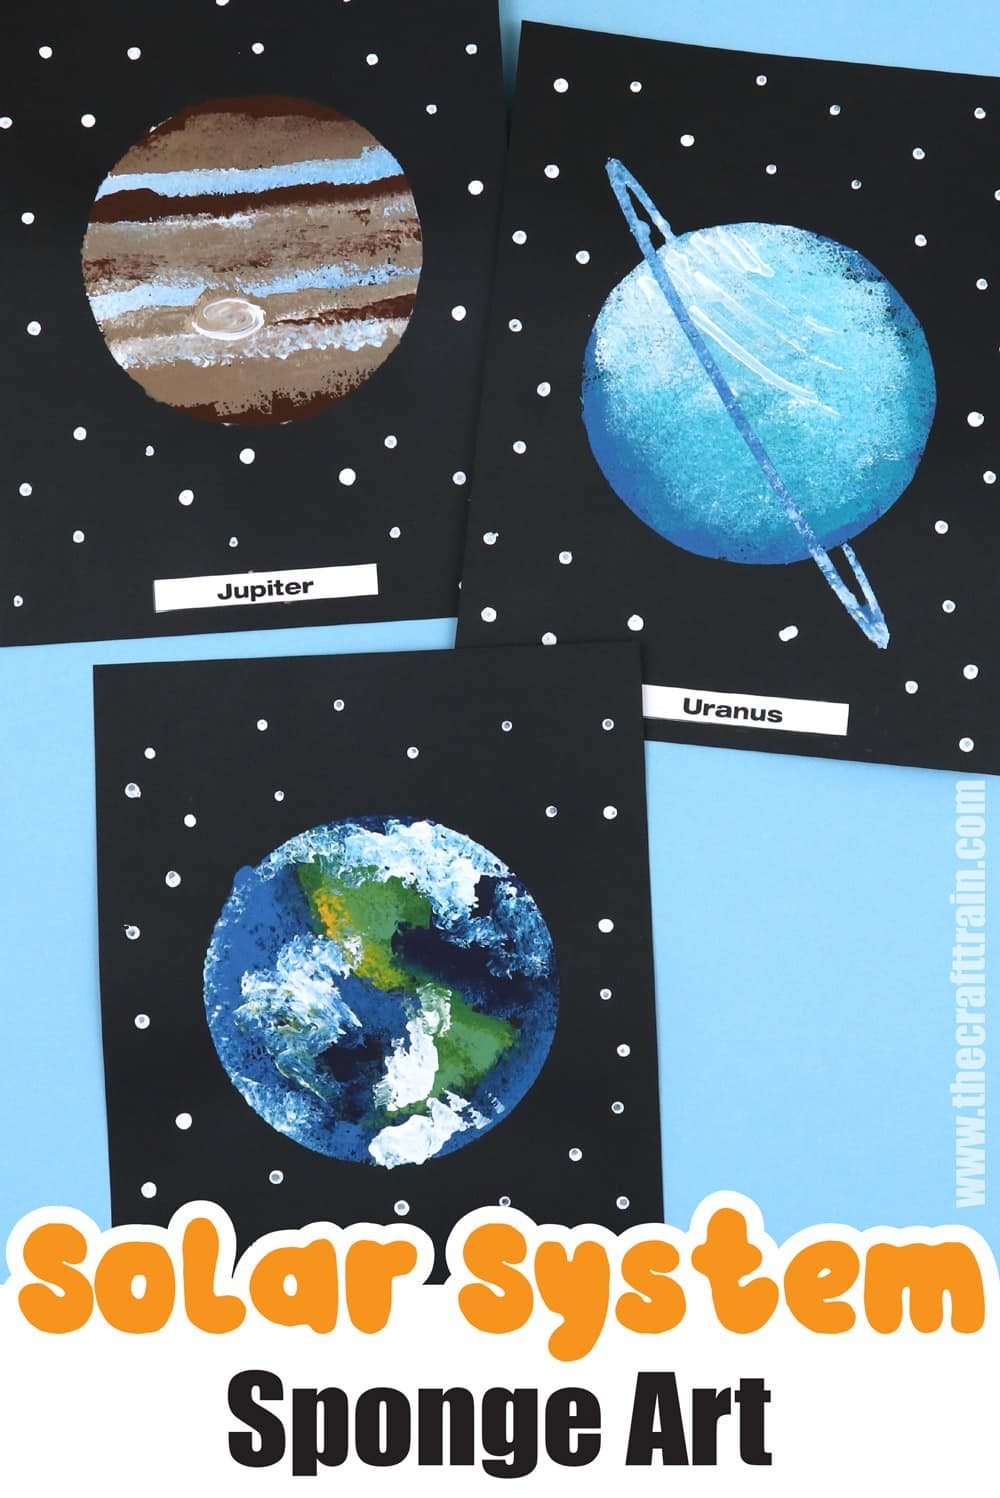
Solar System Art
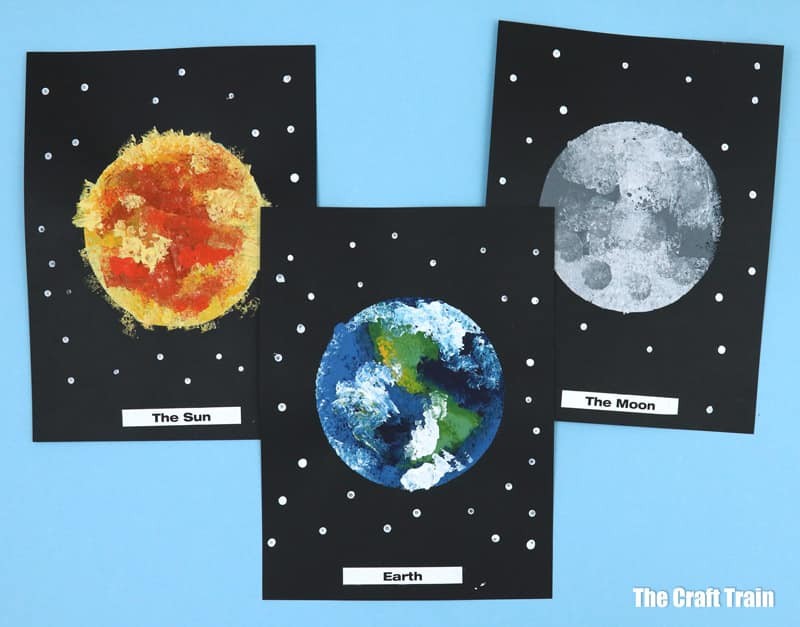
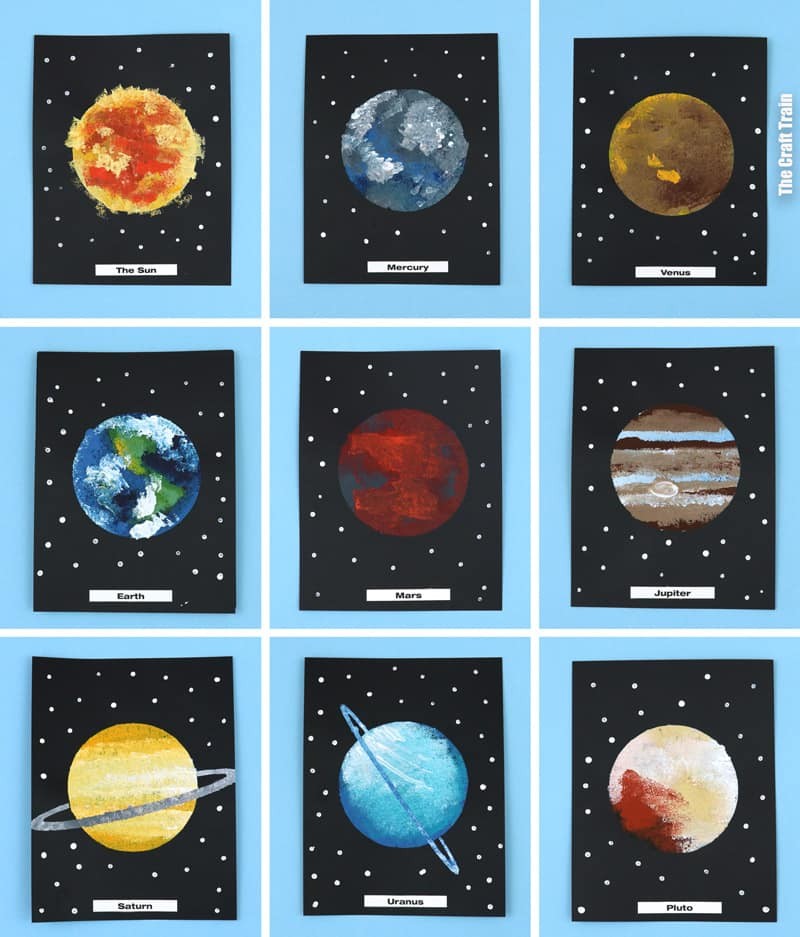
Creating stunning solar system artwork using sponge painting and our exclusive template has never been easier! This tutorial will guide you through the process of painting all eight planets, including the sun and moon, using a clever masking technique. Before we dive in, I’d like to remind you that this project is a great way to support learning about space and our solar system. You can choose to create just one planet or go all out and paint every single one!
Hang them on the wall in the correct order to help kids learn the sequence of planets from the sun. The best part? This project is suitable for grades 1-6, although younger students might need a little extra assistance using blu-tack or similar to keep their template in place while painting. And don’t worry if things get messy – that’s all part of the fun! Just remember to cover your table surface before you start.
If you’re new to our blog, you might be familiar with our set of solar system cards, which are available for free download from our printables library. This project is a natural extension of those cards and can help bring learning to life in a fun and creative way. So, what are you waiting for? Grab your sponge, some paint, and let’s get started on creating an out-of-this-world piece of art!
How to make solar system art
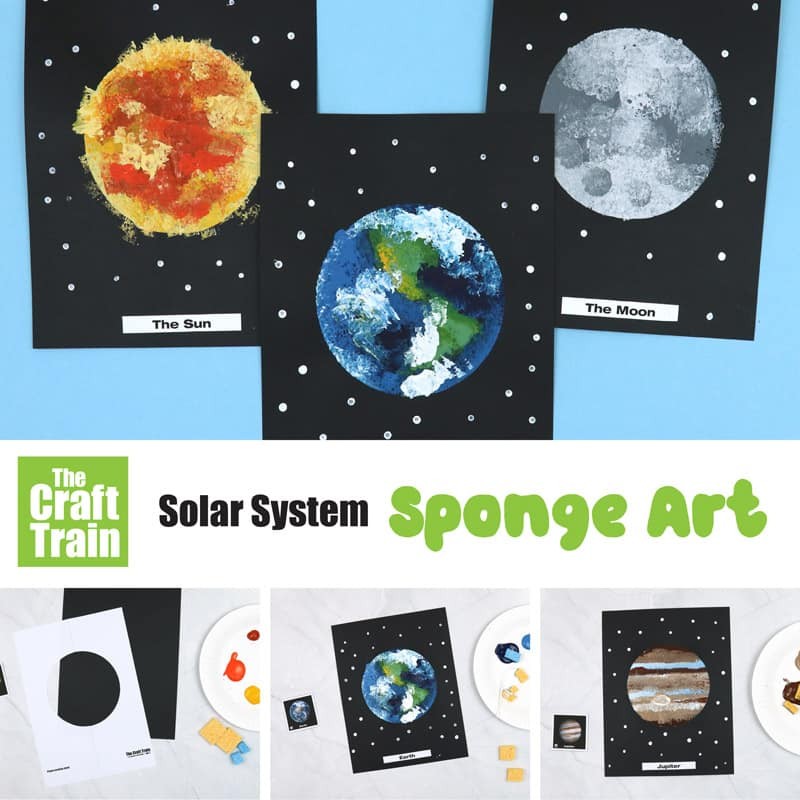
You will need:
To get started with this creative project, you’ll need a few basic supplies. Begin by gathering some essential materials, including a masking template printed on standard white paper, solar system planet cards for reference and color inspiration, card stock in black or dark blue hues to serve as the background for your planetary creations, and small pieces of kitchen sponge for added texture.
Don’t forget to collect acrylic paint in the specific colors you want to use to bring your planets to life, along with a pair of scissors to cut out any shapes or details you desire. Finally, have on hand a Q-tip or cotton bud for blending and smoothing out those paint strokes, as well as a glue stick to secure all your creations in place.
How to:
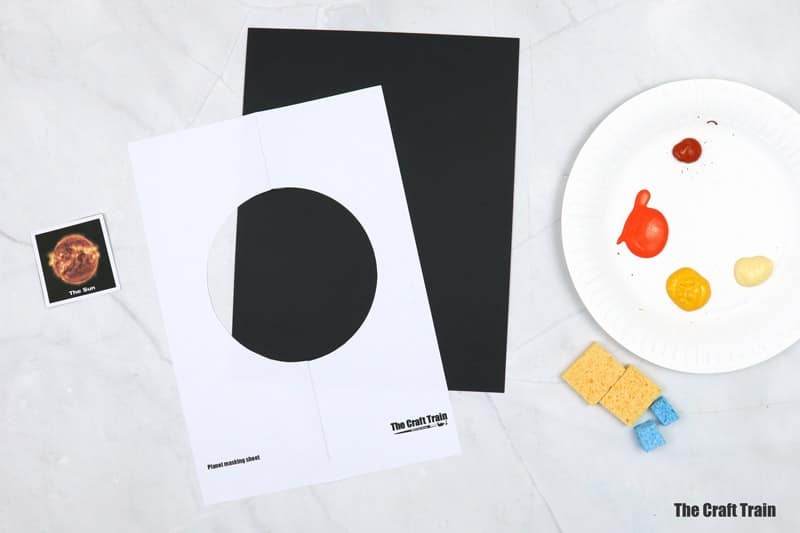
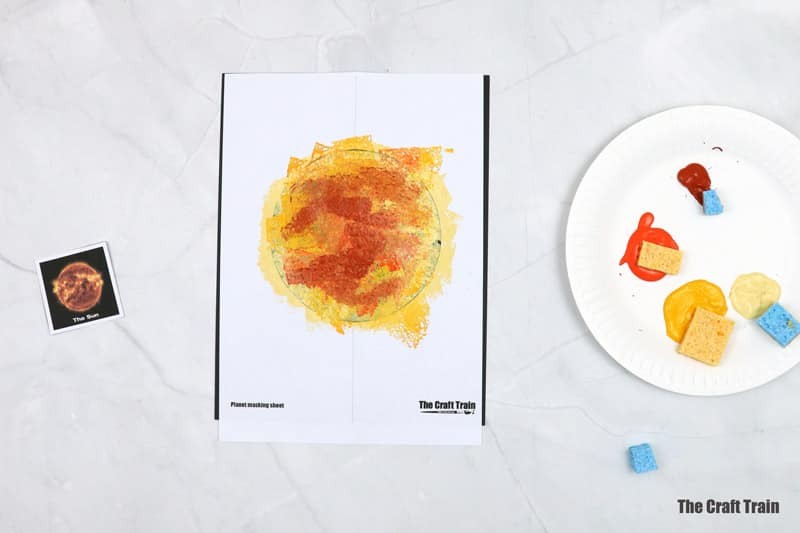
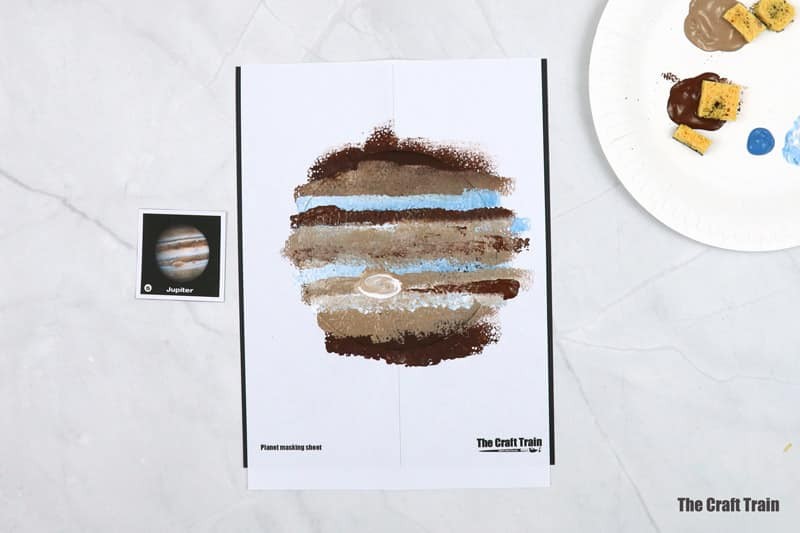
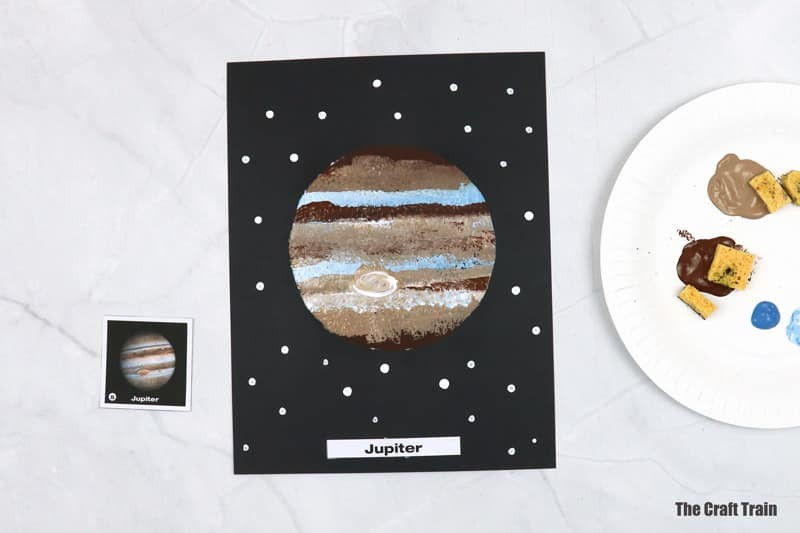
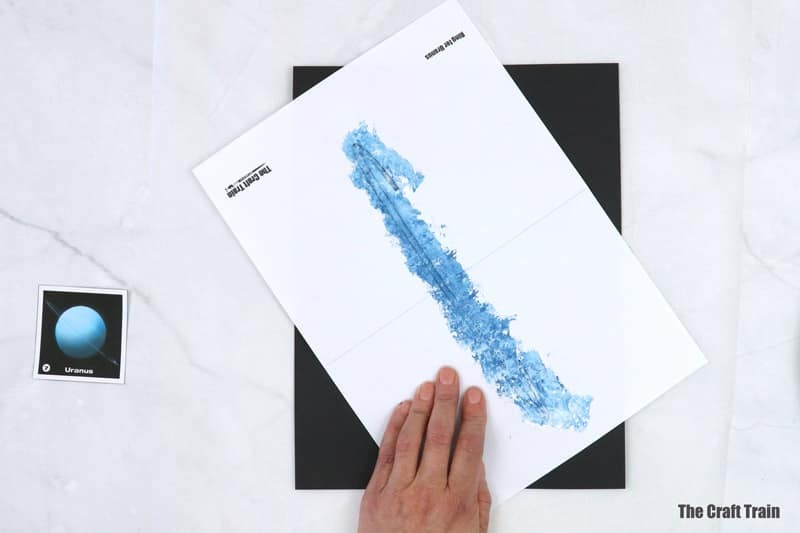
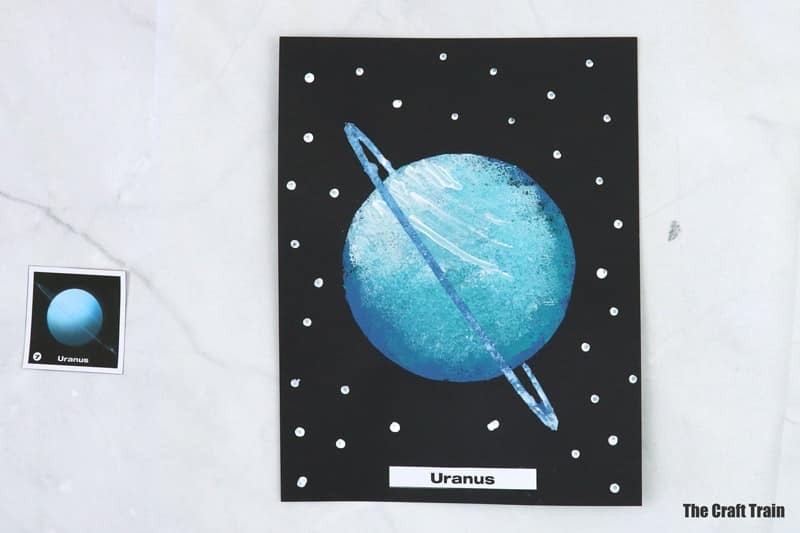
Fold the template in half and cut along the circle’s edge. Discard the center portion and use the outer ring as a stencil. Place this mask over your black card stock, securing it with blu-tack or removable tape if needed – especially helpful when working with younger children. As reference, select a planet card and use sponge squares to add color in roughly matching shades and patterns. Remove the mask, leaving the planet’s outline on the card.
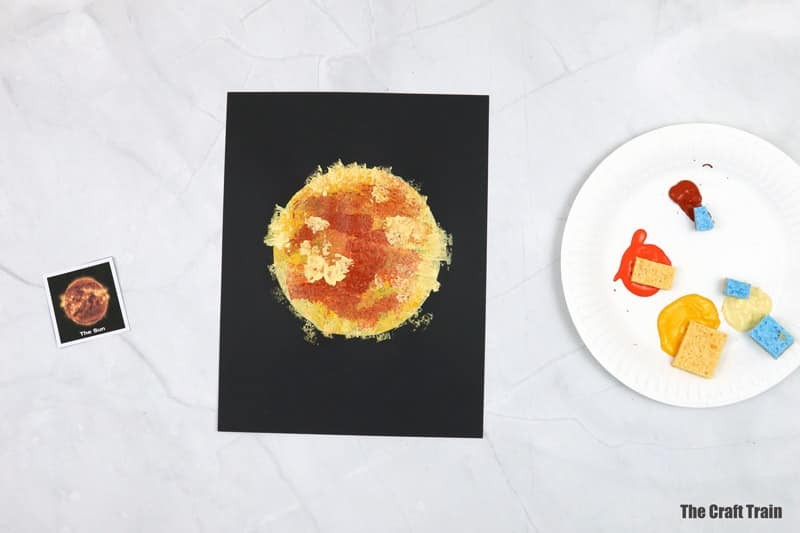
For the sun, apply pale yellow highlights around the circle’s edge after removing the stencil. Interestingly, Jupiter’s notable spot is a massive storm that could swallow our entire planet! Add star dots using a Q-tip (cotton bud) once you’re satisfied with your planet’s appearance. When crafting Saturn and Uranus, allow the circle to dry before applying ring masks to add the distinctive rings. Finally, attach the planet label once your artwork is complete.
You might also like:
Transform your creative space with a galaxy of painted pots, each one a masterpiece of toothbrush splatter painting. For an added touch of whimsy, incorporate sponge fragments to create mesmerizing kaleidoscope prints that will add a pop of colour to any room. If you’re looking for something more dramatic, try combining paint blending techniques with paper mosaics to bring the beauty of a sunset boat scene to life.
And if you want to challenge yourself and have some fun, use our printable template to create a 3D paper doodlebug craft that will have you buzzing with excitement.